

How to make strawberry key lime jam
Strawberry key lime jam is a citrusy twist on the classic. Key limes add a bit more floral flavor and are slightly less acidic than regular grocery store limes. For another unique and delicious jam recipe, try this easy loquat jam.
Strawberries and limes are good together, just try this strawberry limeade for a refreshing summer sip.
Strawberry Key Lime Jam
Strawberry jam with lime is sweet and bright with a bit of citrus. I had fresh juice left from making a key lime pie, so I wanted to incorporate it into this jam.
Strawberry jam is excellent as is, but with the addition of lime, it becomes something really special.
If you don’t have key limes, you can substitute regular Persian limes from the grocery store.
How to can strawberry jam
If you are new to canning, it can be a little daunting. But, with a bit of practice, you’ll be a jam-making pro in no time.
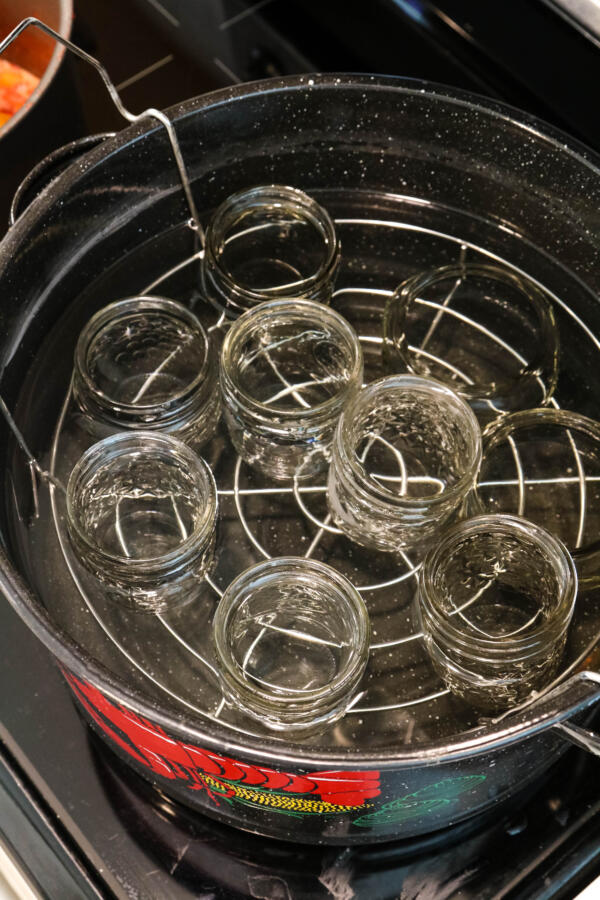
The first step is to sterilize jam jars and lids. Submerge them in simmering water and let them stay in the water until the jam is almost ready. You want the jars to be hot when the jam goes in.
Next, make sure all of your ingredients are measured out and your tools are handy. You don’t want to have to look for a spoon in the middle of making jam.
It takes awhile for the big canning pot of water to come to a boil, so I usually put that on as soon as my jam starts boiling. It’s all about timing.
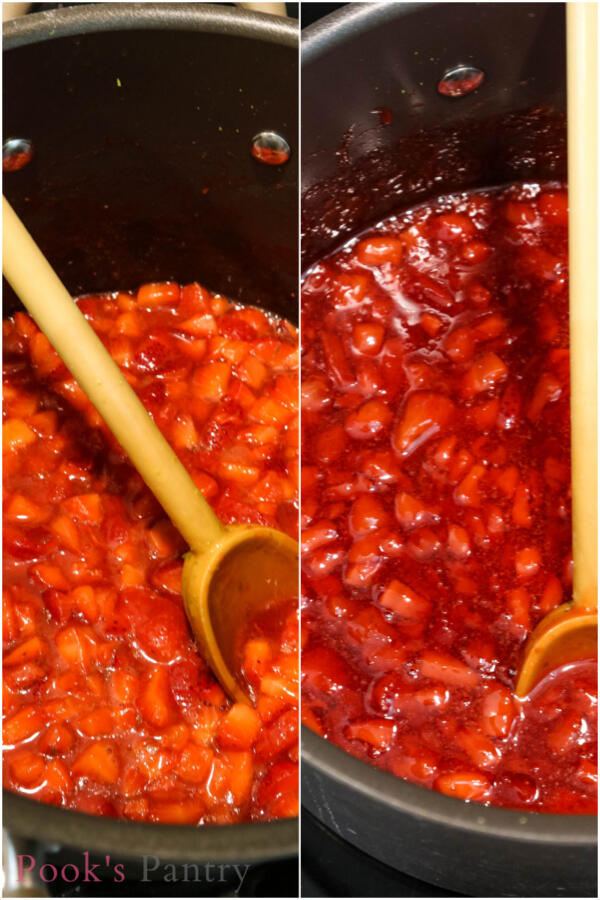
The first photo is the jam when it first went into the pot. The second is at the end of cooking time. Do you see how much deeper in color and thicker the jam has become?
Once the jam has been tested for gel stage (we’ll get to that in a second!), it’s time to put the jam into the jars.
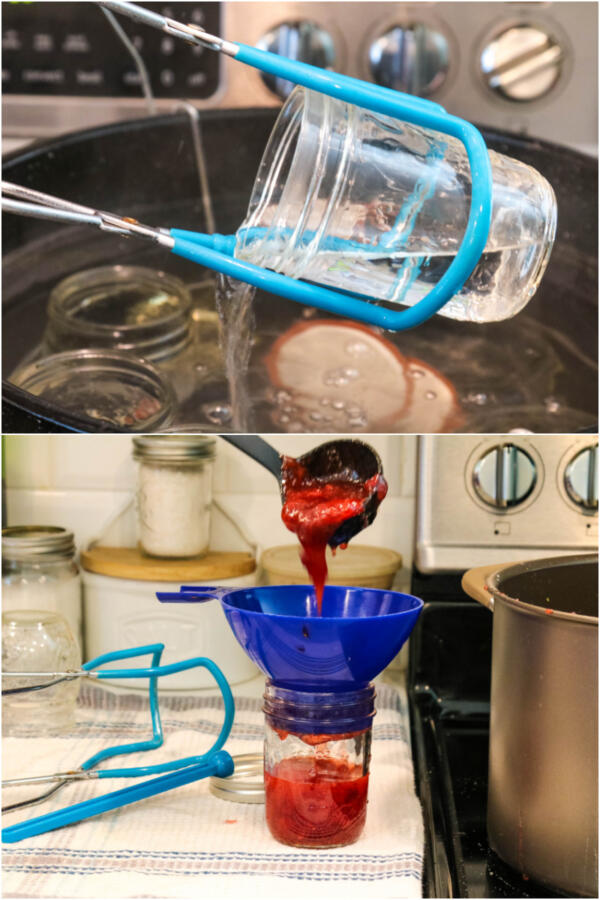
Time to put the jam in jars
Using canning tongs, remove the jars from the hot water and place them on a kitchen towel. Place a funnel inside of the jar and ladle your jam into the jar, leaving 1/4″ of space at the top of the jar.
This last bit is important because a proper seal may not form if you don’t leave any room at the top of the jar.
The rings go on and tightened to “fingertip tight”, which means that you stop when you feel just a bit of resistance. If the lids are screwed on too tight, the air bubbles will not be able to escape.
The seals will form as the jam cools. You’ll hear that glorious “ping” sound and you’ll know the lid is sealed properly.
Testing jam for gel stage
Once your jam has cooked down and is thickened, test it for the gel stage. To do this, you’ll put a teaspoon or two of jam on a plate that you’ve put in the freezer.
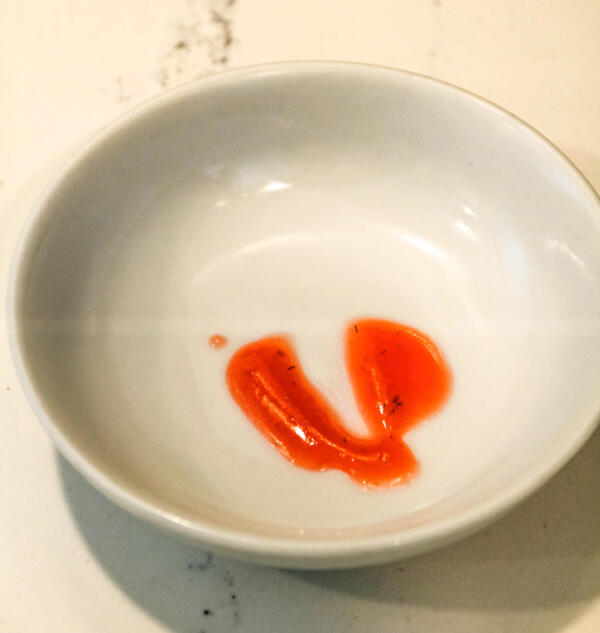
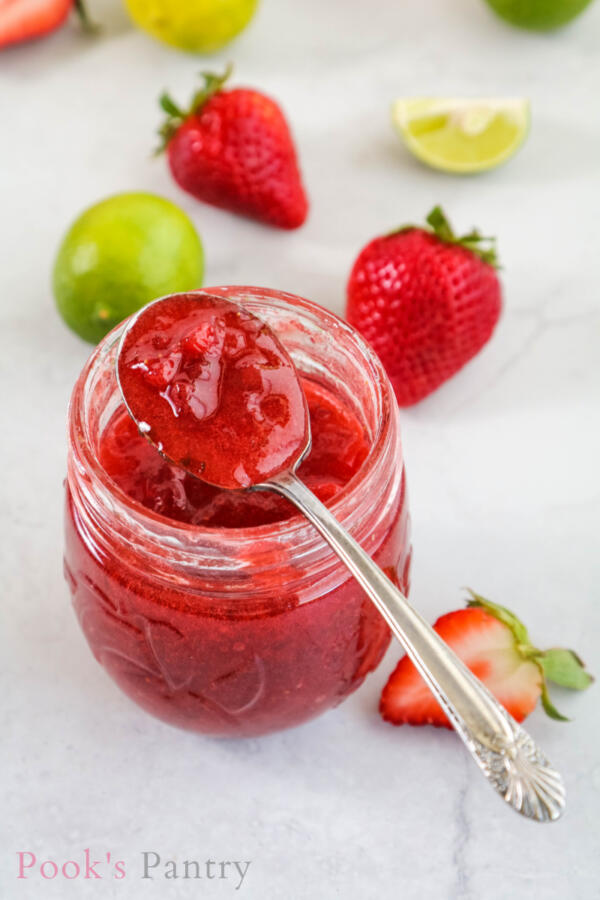
Put a spoonful of strawberry key lime jam on the dish and put it back into the freezer for one minute. I swipe my finger through it to see if it runs back together. If it doesn’t come back together, I know the jam is ready.
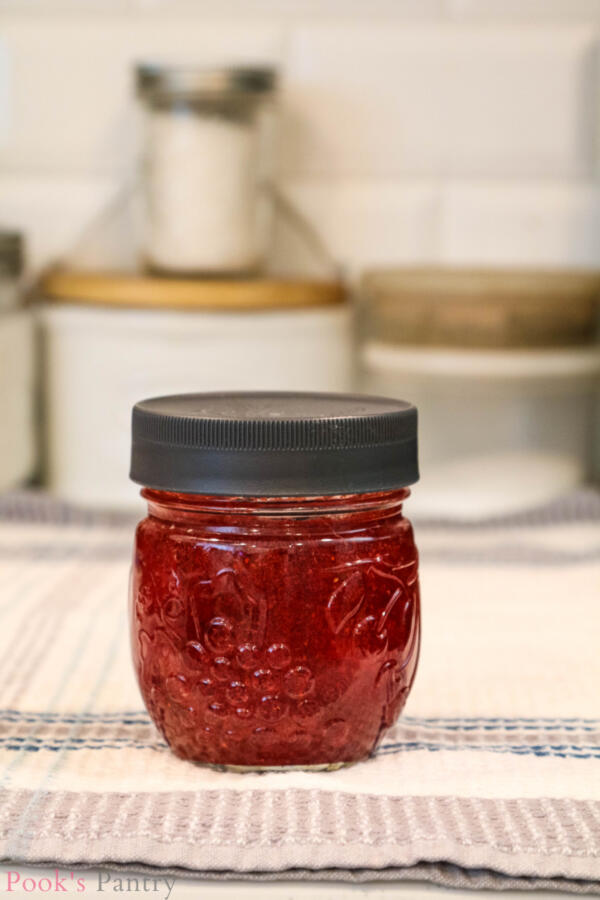
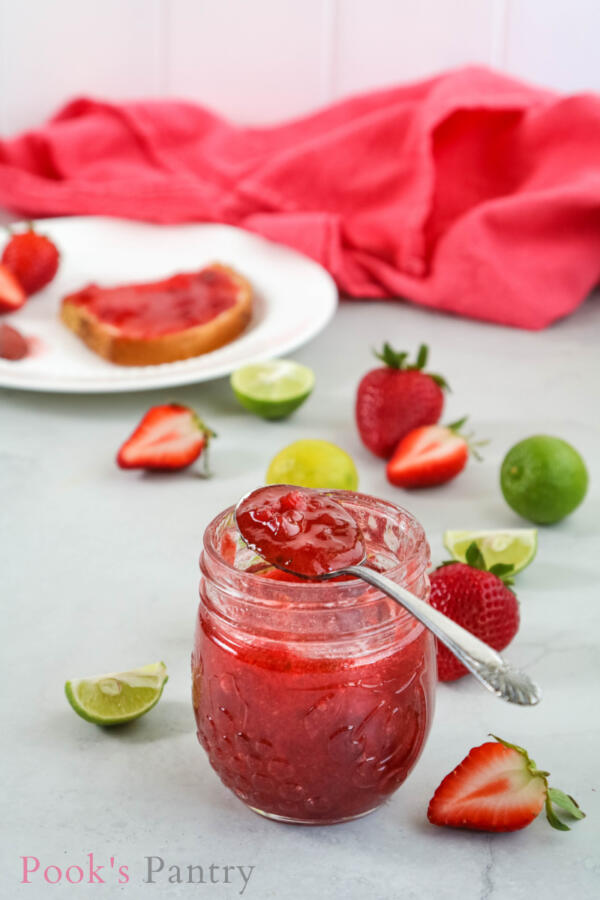
If you have a bit of jam leftover, or you plan to keep a jar in the fridge for eating right now, you can use a plastic, leakproof storage lid.
And, why wouldn’t you want to celebrate your hard work by digging into this gorgeous jam?
Tools for making jam
Below is a list of helpful equipment for making homemade jam. Some of it is canning specific, but some of it is not and you probably have most of it already.
- half pint jars
- new lids and rings (reused lids increase the chances of a bad seal)
- long handled wooden spoon or non-reactive spoon
- a large stock pot with rack
- canning tongs (jar lifter)
- canning funnel
- potato masher
- oven mitts
- non-reactive ladle

More jam recipes
Here are a few more recipes that we love. Homemade jam makes a great gift to share with friends and neighbors, so keep a few in the pantry to give away!
- Blueberry bourbon jam
- Fig jam with vanilla
- Strawberry loquat jam
- Peach pepper jam
- Blackberry blueberry freezer jam
- Loquat cardamom jam
Please share
If you love this recipe, please give it 5 stars!

Your shares help this site to grow and I appreciate it so much. Do you know someone who would like this? I’d love it if you would share it on Facebook or pin it to your favorite recipe board.

Strawberry Key Lime Jam
Ingredients
- 2 lbs. strawberries washed, hulled and roughly chopped (about 6 cups)
- 1-1.75 oz pkg powdered pectin
- 1/4 cup fresh key lime juice
- 3 tbsp. key lime zest
- 7 cups sugar
Instructions
- Place 9 half pint (8 oz) mason jars in a very large stock pot/canning pot. Add enough water to cover the jars and bring to simmer.
- Place the lids into a small saucepan and simmer those in a bit of water as well. No need to warm the rings, just the lids. (Make sure you are using new lids, it’s best not to reuse them.)
- Put a small plate in the freezer to test doneness for jam.
- Combine strawberries, pectin, lime juice and zest in a large stock pot. (You’ll want plenty of room at the top when the mixture starts boiling)
- Bring mixture to a boil, stirring occasionally, then add sugar all at once and stir until completely dissolved. Return to a rolling boil and let it boil HARD for 60 – 90 seconds, stirring constantly.
- Reduce heat and let the jam simmer for 20 – 25 minutes until it reaches gel stage.
- Remove from heat and skim off as much foam as you can without taking too much of the jam.
- Using canning tongs (or regular tongs with a dish towel wrapped around them) remove the jars from the water, pour the water out and set a wide mouth funnel inside of one jar.
- Using a ladle or measuring cup, scoop jam and pour into warm jar leaving 1/4" of space at the top. Repeat until all the jars are filled, then wipe the rim of the jar with a damp towel, making sure the thread of the jar is clean.
- Remove the lids from the simmering water, screw on the rings but do not tighten all the way. Enough to secure the lid, but not completely tightened. Repeat with remaining jars.
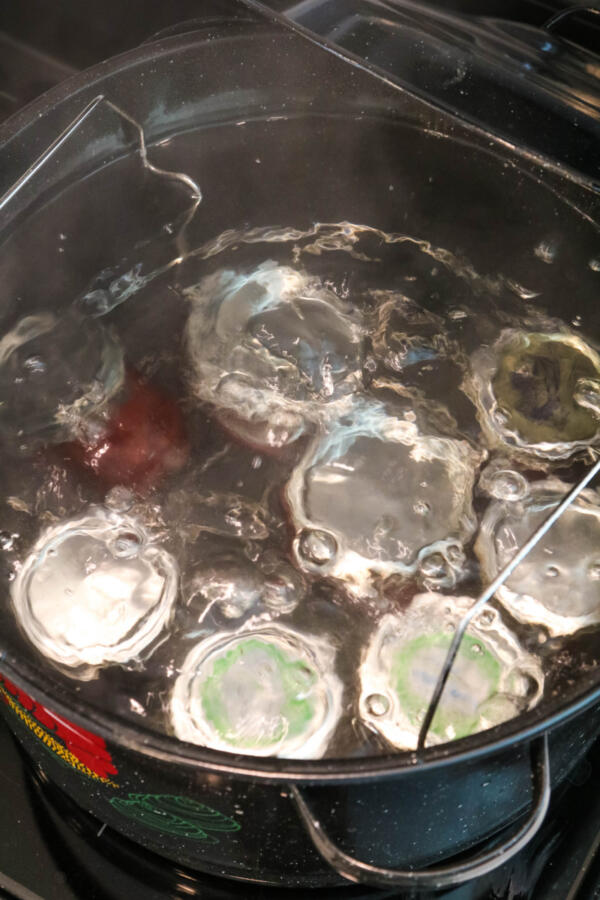
- Place jars into a canning rack if you have one and lower into water in canning/stock pot. If not, use tongs and lower the jars one by one (fairly quickly) into the water. Make sure water covers the jars by at least an inch, two if possible.
- Bring water to a full boil. Boil for 10 – 12 minutes, then remove from water. (I always place my hot jars on top of a dishtowel on the counter so nothing slides around.)
- Leave jars for 24 hours, you will hopefully hear that beautiful "PING" sound fairly soon after they’ve come out of the water, but it may take a little while.
- To make sure the jar has sealed properly – press on the lid. If it has ANY give whatsoever, that guy has to go in the fridge. Otherwise, your jam is good to go! Remove rings, if desired. You don’t need them anymore.
Notes
Nutrition
Thanks for stopping by! Have a delicious day 🙂

Questions? Send me an email, I’m happy to help. I’d love to send you weekly tips and recipes, so you can get updates about what’s happening in the kitchen!
Hello! All photos and content are copyright protected. Please do not use my photos or recipe without prior written permission. Thank you!
Originally published 3/28/14, most recent update 3/29/21
Ooooh…. I so miss strawberry season in Florida, going to the pick-ur-own places. And Florida strawberries. Seems a shame the Festival didn’t have more food and seems too weird but look what you got! Wish I could taste that jam!
Can you substitute juice instead of fresh strawberries to make as jelly
I’m not sure, Teri. I’ve never tried that. In theory, it might work, but as I’ve never done it, I can’t say for sure what the results would be.