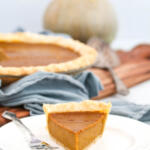
Hubbard squash pie recipe
Hubbard squash pie is a delicious, and nutritious, alternative to canned pumpkin. This blue-gray squash is one of the best tasting winter squashes available, and it is perfect for pie making.
Servings: 8 servings
Calories: 579kcal
Ingredients
For the pie crusts
- 2 ⅔ cups all-purpose flour + extra for dusting 320g
- 1 tsp. fine sea salt
- 2 tsp. sugar
- 1 cup unsalted butter VERY cold, cut into small cubes / 2 sticks // 226g
- 4 - 6 tbsp. ice water
- 1 egg whisked, for brushing on crust, optional
Hubbard squash pie filling
- 1 ½ cups Roasted Hubbard squash purée *See notes // 375g
- ¾ cup heavy cream 175mL
- 3 large eggs whisked
- ¼ cup brown sugar 53g
- ¼ cup granulated sugar 50g
- ¼ cup maple syrup 78g
- 1 tbsp. vanilla extract or vanilla bean paste
- 1 tbsp. cornstarch
- 2 tsp. ground cinnamon
- 1 tsp. ground ginger
- 1 tsp. fine sea salt
- 1 tsp. ground nutmeg
- ½ tsp. ground cloves
- ½ tsp. ground mace
Instructions
Make the Hubbard pie filling
- Preheat the oven to 400°f / 200°c. Line a baking sheet with parchment paper, and set aside.Slice the Hubbard squash in half, and remove the seeds. (Save the seeds to make roasted squash seeds later.)

- Roast the squash for 45 - 60 minutes, uncovered, until a knife easily pierces the flesh with no resistance. Let the squash cool to room temperature, then scrape the flesh away from the skin. Discard the skin.
- Measure 1 ½ cups of squash, and place it in the bowl of a food processor, or a high powered blender.Purée the squash in the food processor just until it is completely smooth.
- Add remaining ingredients for Hubbard squash pie filling, and turn on processor to combine. Scrape down the sides of the bowl to make sure everything is incorporated, then give it another few pulses. The filling is ready to use, or refrigerate for later.

Make the pie crust
- While the squash is roasting, make the pie crust. In a medium mixing bowl, whisk together the flour, sugar, and salt.
- Add cold butter to the bowl, and using a pastry blender, or a fork, cut butter into flour until there are only a few pieces the size of a pea remaining.

- Add a tablespoon of water at a time to the flour mixture, using a fork to slowly incorporate the water into the flour. (You'll need between 4 - 6 Tbsp. of water total. Do not be tempted to add more.) Use the fork to smoosh the mixture against the side of the bowl, as you are working it in.

- When the dough has formed, but is still a little crumbly, dump the mixture out onto a floured surface, and form two even-sized balls of dough.
- Flatten into a disk, and wrap tightly with plastic wrap. Refrigerate for at least 30 minutes, up to 2 days. (You'll only need one ball of dough for the crust. The other is for back-up, in case you need it, or for cutting decorations out for the crust.)
- After the dough has rested in the fridge, let it warm up for 5 minutes on the counter before rolling it out.Lightly flour a work surface, then roll the dough out to roughly an 10½" (27cm) circle, starting from the center, and rolling out to the edge of the dough.
- Gently roll the dough onto the rolling pin to transfer to the pie plate. Lift the edges of the dough to fit it, do not pull on the dough. Tuck the edges underneath, and crimp with a fork, or your fingers to make a decorative edge.Place the crust in the freezer for at least 20 minutes before filling.

Fill and Bake the pie
- Preheat the oven to 400°f / 200°c. Place a metal baking sheet in the oven to heat if you are using glass pie pans. (*If you are using metal pie tins, no need to preheat the baking sheet.)Brush egg wash on bottom of crust, if desired, to help seal the crust.
- Pour filling into chilled crust, and place on preheated baking sheet. Bake at 400°f for 10 minutes.Reduce heat to 325°f / 160°c, and bake for an additional 50 - 60 minutes. You may want to cover the crust with foil to prevent burning, about halfway through baking.

- The pie is done when the center looks slightly "jiggly", but not wet. To test the pie, a knife inserted in the center should come out with only a little filling stuck to it.Let the pie cool to room temperature before serving. Store leftover pie, covered, in the refrigerator.
Notes
- Both the filling and the dough can be made a couple of days ahead. Store in refrigerator.
- In the unlikely event that your squash looks too watery after you've puréed it, line a fine mesh strainer with cheesecloth, and set it over a bowl. Scrape the purée into the strainer and let it drain for about an hour before making the filling.
- Spices - I like a strongly spiced pie. If you prefer a more subtly spice dessert, you can reduce the amount of spices by a quarter.
- I made this recipe both with heavy cream and with evaporated milk, to taste test the difference. For me, the pie made with cream yielded a much creamier and silkier filling. The pie filling made with evaporated milk wasn't as smooth, and it wasn't as creamy.
- If the crust is starting to brown too much: cut a 12" piece of foil, then fold it in half, then in half again to make a square. Cut the center out so that it will give you a circle in the middle of the foil when opened up. Place over the top of the pie and secure foil under the edge of the pie plate.
- Store leftover pie, covered, in the refrigerator for up to 4 days.
- Lastly, everyone's oven is different! Unless you've had your oven calibrated, or you use an oven thermometer, know that your oven is likely off by a few degrees. When you are within 10 minutes or so of the timer going off, start checking the pie. Especially if you know your oven runs a little hot.
Nutrition
Serving: 1slice | Calories: 579kcal | Carbohydrates: 60g | Protein: 9g | Fat: 34g | Saturated Fat: 21g | Polyunsaturated Fat: 2g | Monounsaturated Fat: 9g | Trans Fat: 1g | Cholesterol: 176mg | Sodium: 529mg | Potassium: 231mg | Fiber: 3g | Sugar: 22g | Vitamin A: 1474IU | Vitamin C: 3mg | Calcium: 79mg | Iron: 3mg