

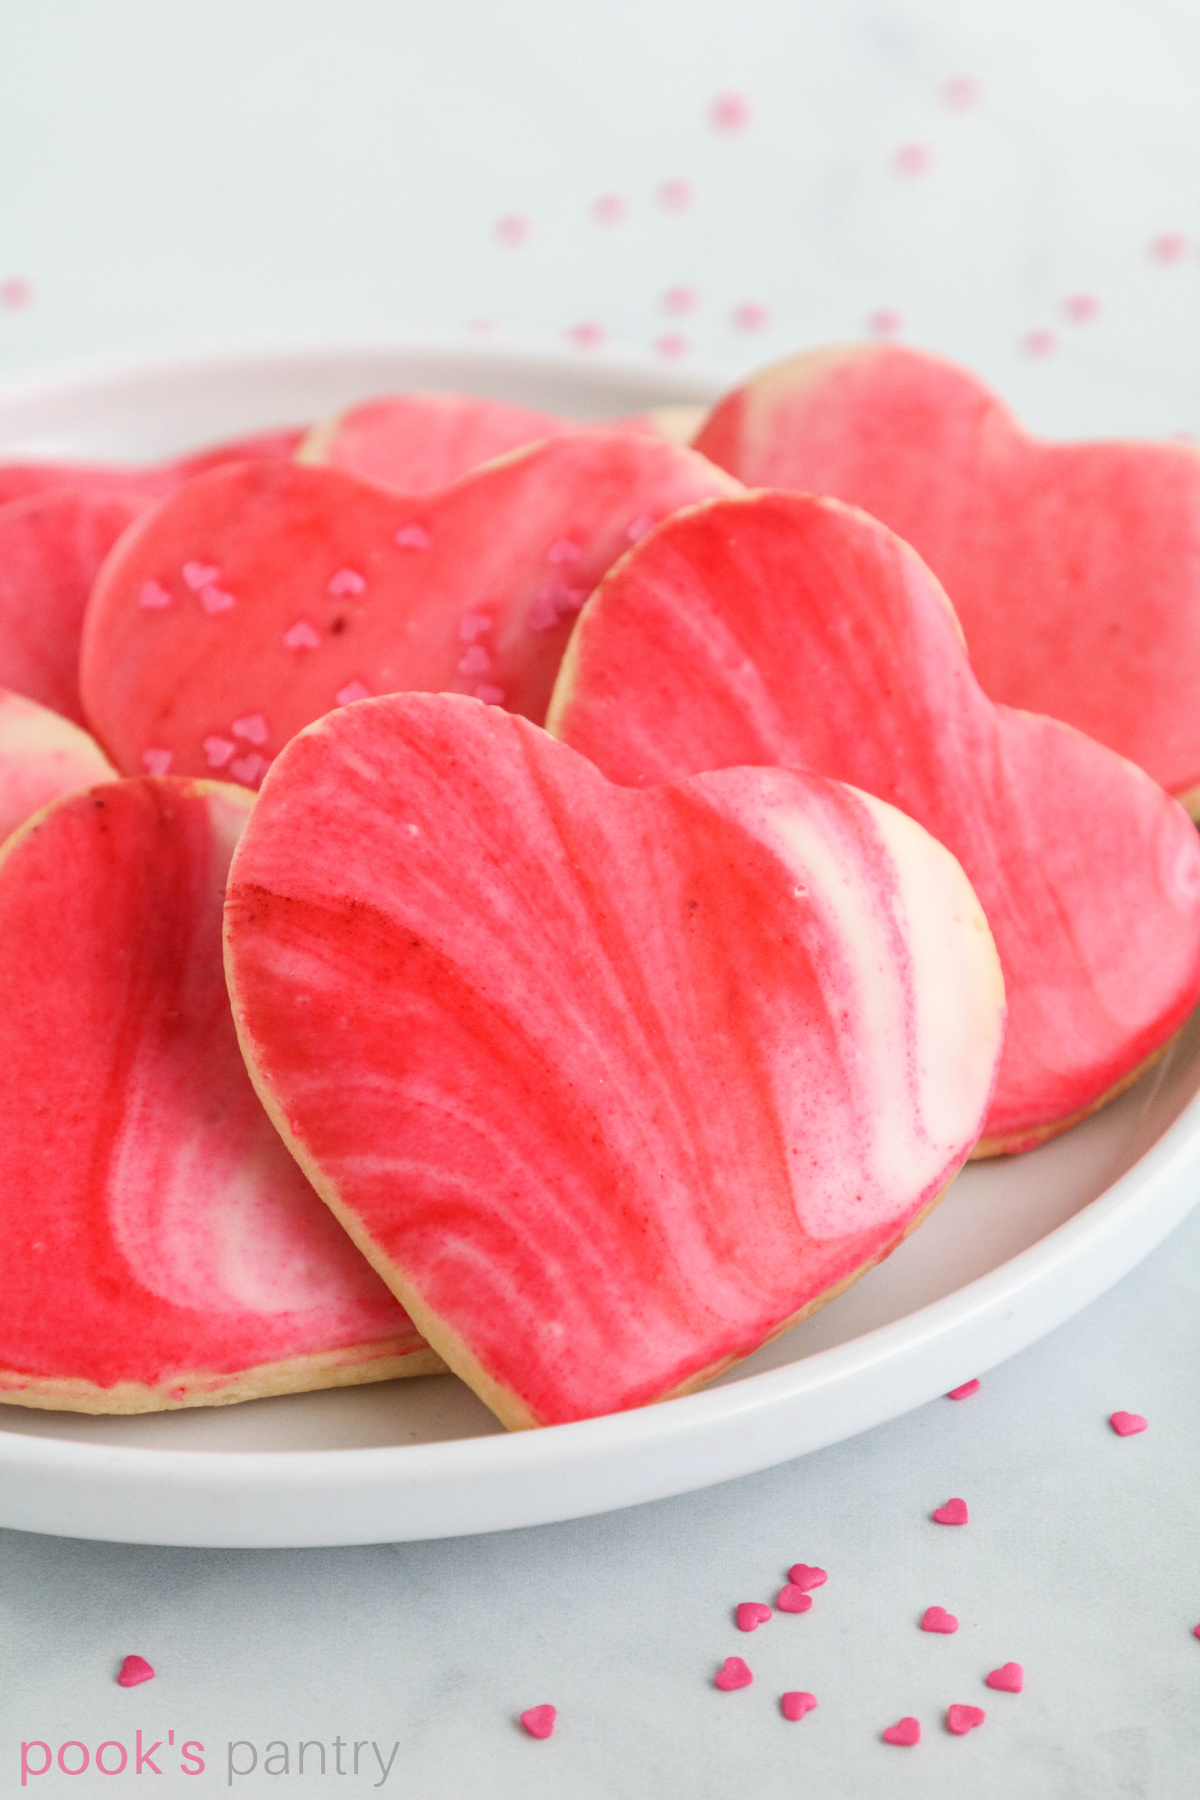
Valentine cookies with marbled icing
Sugar cookies should be enjoyed all year, not just at the holidays! These heart-shaped Valentine cookies are perfect for sharing. My classic sugar cookies are coated with an easy marbled icing for an extra special Valentine’s Day treat.
I’ll give you variations and substitutions where I can, plus helpful tips and tricks for success. Read on for this info as well as the recipe. If you’d like to skip straight to the recipe, use the jump to recipe button at the top of the post.
You may also be interested in my classic sugar cookie recipe and my red velvet sandwich cookies recipes. For ease of browsing, you can find all of my cookie recipes in one place.

Pook’s Pantry participates in affiliate programs. If you make a purchase through one of my links, I may earn a small commission. For more information, please see my disclosure policy.
Why you should make this recipe
- Special occasion – This recipe feels special and it is perfect for Valentine’s Day.
- Easy – The recipe takes a little longer than some cookies, but it is not difficult.
- Versatile – You can use this recipe for any holiday! Change the cookie cutter shape and frosting color to make cookies for birthdays and other holidays.
Valentine cookies with marbled icing
For these heart-shaped cookies, I’m using a very simple cookie icing that is stirred together, then swirled with color. No mixer necessary – just a bowl, a small whisk and a wooden skewer

Ingredients for cookies
To make these Valentine cookies, you’ll need the following 9 ingredients: all purpose flour, cake flour, unsalted butter, sugar, eggs, vanilla, salt, baking powder and milk or cream.

How to make marbled sugar cookies
- The first step is creaming the butter and sugar together until it is light and fluffy. This takes a few minutes, don’t rush it. If the color of your mixture has not lightened, you’re not done yet.
- Next, scrape down the sides of the bowl, then add in the eggs and beat until they are well incorporated.
- Combine all of the dry ingredients, and add in two batches, alternating with the cream.
- Lastly, roll out the dough to 1/4″ thickness between two sheets of parchment paper, then chill or freeze the dough until it is firm enough to use your heart shaped cookie cutters.

Once your cookies are baked and cooled, it’s time to dip them.

How to make marbled icing
This quick and easy marbled icing is the perfect glaze for these Valentine cookies.
You’ll need the following ingredients:
- powdered (confectioner’s/icing) sugar
- corn syrup
- vanilla extract
- a pinch of salt
- water (or vodka)
- gel food coloring
To make it a little richer and give it some body, you can add a splash of half and half or cream. To thin the icing, you can add more water, vodka, half and half or corn syrup. You have options.
Corn syrup will make the icing really shiny, which is pretty, but it takes longer to set. I leave it for a full 24 hours to make sure it has hardened before I touch it.
Mix all of the ingredients (except the gel color) together. Add a few drops of color and use a toothpick or wooden skewer to swirl.

How to dip cookies in icing
Dip Valentine cookies straight down into the marble icing and lift out. Tilt cookies to the side to let excess run off. I like to use a wooden skewer to gently scrape the sides so they stay clean as it is dripping off the edge.
Then, I tip the cookie in the opposite direction for a few seconds to let the icing settle on top of the cookie instead of the edge.
Would you like to save this recipe?

Marble icing – tips and tricks for success
Before you start, make sure that the bowl you choose is wide enough to dip your cookies. You’ll want to have enough room to dip straight down, so double check that your largest cookie fits inside the bowl before you begin.
Getting the right consistency is key. Check the consistency by drizzling a bit of icing back into the bowl from a spoon.
If it takes about 8 seconds for it to completely disappear, you’re good to go. If it melts back in within a second or two, it is too thin – add a few tablespoons of powdered sugar to thicken.
The icing will eventually have less of a marble affect as you dip more and more Valentine cookies. You can either make two separate bowls or set some plain icing aside before you add color, so you can add white icing back into the bowl to break up the color.

Finishing touches
The last tip to make these Valentine cookies absolutely perfect is to use a toothpick or the tip of a wooden skewer to pop the tiny bubbles that might form on top after you’ve dipped the cookies in the marble icing.
It is imperative that you do this before it starts to set. If the icing is still wet, it will fill right in and you’ll never see it.

Finally, I use these snap on sheet pan lids to cover the cookies while they are drying. This allows me to stack the sheet pans so it takes up less room and it keeps everything (and everyone) out of the cookies.
Valentine cookies FAQ’s
You can use royal icing that is perfect for decorating, or an icing that is better for spreading or dipping, like the one in this Valentine cookie recipe. Both contain powdered sugar, but they have different consistencies.
It is ENCOURAGED. I always make my dough ahead of time and put it in the freezer.
It takes at least 6 – 8 hours for the icing to harden, so plan ahead. I leave mine overnight to make sure it is completely set.
Helpful tools and equipment
- Food scale – An absolute must for bakers. Weighing ingredients is far more accurate than measuring with cups and spoons, and I cannot recommend owning a scale strongly enough.
- Valentine cookie cutters – This set comes with an assortment of fun shapes.
- Silicone baking mat – This yielded the best results. I preferred baking on this over baking on parchment paper.
- Gel food color – This is the brand that I have. Avoid liquid food coloring, it won’t give you the same results and it will make the icing runny.
- Luster dust is an edible food color that comes in powdered form. By mixing it with a drop or two of vodka, it becomes a “paint” to color the frosting or the cookie itself. It comes in every imaginable color and looks beautiful on iced cookies. It can deepen the colors of the frosting or just add a little shine or sparkle to give them an extra special look.
- Stand mixer – This is the mixer that I’ve had for almost 10 years. It gets a TON of use and is worth every penny.
- Sheet pans – Invest in heavy duty, commercial baking sheets. They aren’t pretty, but they don’t warp and they last a lifetime.
More Valentine’s Day treats
- Hibiscus champagne cocktail
- Valentine’s chocolate bark
- Chocolate coconut truffles
- Strawberry scones
- Valentine’s Chambord champagne cocktail
Please share
If you love this recipe, please give it 5 stars!

I hope you love these Valentine cookies as much as we do! Please consider rating and/or commenting.
Your shares help this site to grow and I appreciate it so much. Do you know someone who would like this? I’d love it if you would share it on Facebook or pin it to your favorite recipe board.

Valentine cookies with marbled icing
Equipment
Ingredients
Marble icing
- 2 1/2 cups powdered sugar
- 3 – 4 tbsp. water or vodka
- 2 tsp. light corn syrup
- 1/2 tsp. vanilla extract
- 1/8 tsp. sea salt
- gel food color
- half and half optional, if needed *see notes
Instructions
- Make sugar cookies
- Whisk all purpose flour, cake flour, baking powder and salt in a large bowl, set aside.
- In the bowl of a stand mixer, with paddle attachment, combine butter and sugar. Beat on medium speed until fluffy and light in color, about 5 minutes. (If using a hand mixer about 7 – 8 minutes.)
- Add the eggs and beat on medium speed until incorporated, then add the vanilla and beat until mixture is uniform.
- Add flour mixture in two batches, alternating with the cream, and mix until just combined.
- Divide the dough into thirds and roll out to 1/4" thickness between 2 sheets of parchment paper. (You'll have 3 pieces of dough, you'll need 6 sheets of parchment)
- Put the sheets of dough (and the paper!) on a sheet pan to keep them flat, then freeze for an hour until dough is very firm.
- Dip cookie cutter in flour, then cut out shapes and place them on a baking sheet lined with a silicone baking mat or parchment paper. Freeze the dough for a minimum of 2 hours. (I wrapped my sheet pans up and froze overnight).
- Preheat oven to 325°F with convection or 350°F without convection.
- Remove sheet pan from freezer and bake for 18 minutes. (This is for 3 inch cookies. If your cookies are smaller or larger, adjust the time by a minute or two)
- Let cool on baking sheet for a few minutes before transferring to rack to cool completely.
Make icing & dip cookies- Stir powdered sugar, water (or vodka), corn syrup, vanilla and salt together in a bowl wide enough to fit your largest cookie.
- Test icing for consistency (see note) and adjust if necessary.
- Add 3 – 4 drops of gel color and swirl with a toothpick or wooden skewer.
- Hold cookie above icing bowl and gently dip straight down, then pull up and tip cookie to let excess icing run off the side. Tip in the opposite direction to let icing settle. (This will also give you a better marbling effect)
- Place cookies on baking sheet to let the icing harden for at least 6 – 8 hours, up to 24 hours.
Chef’s Notes
Nutrition
Nutrition Disclaimer
Nutritional information is an estimate provided to you as a courtesy. Use your preferred nutritional calculator using the products and brands you are using for exact information.
Thanks for stopping by! Have a delicious day 🙂

Questions? Send me an email, I’m happy to help. I’d love to send you weekly tips and recipes, so you can get updates about what’s happening in the kitchen!
Hello! All photos and content are copyright protected. Please do not use my photos or recipe (other than for personal use) without prior written permission. Thank you!